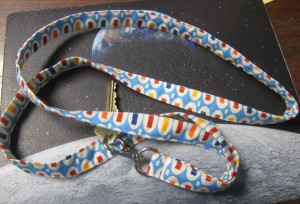
My keys my keys. I don’t like to lose my keys! I’m usually – that’s 99% of the time certain where I put my keys. I do not ever allow time to search for them because I’m so consistent in the place they live. There has been a time or two that they have been misplaced but it’s rare. Well now I have one more key to keep track of. It will need to be in my purse because it’s to a new door that will be part of my regular schedule for a while. The dilemma is how to keep track of the key. I don’t want to put it on the key chain with my car key and my house key. I will not use the key more than a couple of times a week and it looks identical to my house key. I didn’t want to add the weight of a big key ring or a bulky key chain to my purse because it feels like I carry around more than I need anyway. The solution is a lanyard. I have eyed these for a while and been anxious to make some more. I think they would be a good sale item as well and they are fast and fun to make. Well as fast as anything is that you have to cut and sew. I interfaced it so there is a bit of substance to it yet it is light and flexible and should be easy to find in my purse. It also is big enough that it will be easy to keep track of. All these are important criteria in my world. Problem solved and now it’s off to read for a bit before bed.
Page 10 of 19
Today I’ve decided that it’s time to start cleaning up the mess. There are piles and boxes of fabric all over the place and it’s starting to bother me. I still have some other work should do but soon this will be done and I can start organizing and doing some spring cleaning. My biggest challenge is logistics. What is the best way to stack the fabric and store the supplies so that I can get to them easily. I would like to have the fabric visible. Right now it’s in several different boxes and stacks and I can’t always easily find the piece I’m looking for. The other problem is forgetting what I have and accumulating more. In this year of intention I’m trying to use what I have before I buy anything else. I’ve been thinking about this for several months and today I realized I have a possible solution. I can move an unused desk that is now covered with clutter. In the space where the desk is I can move in some shelves from the garage. This set of shelves is of the wire variety and is on wheels. It has four shelves that will be perfect for my needs. I can keep the large pieces of batting and fleece on either the bottom or the top, stack some clear boxes of works in progress on a shelf and still have room to create stacks of fabrics. These pieces are all less than one yard and when stacked don’t take up much room. I think I’ll sell the desk that’s in the corner although it may get moved to the garage for storage until I know that it really is an extra that I don’t need. Time to stop thinking and start cleaning up!
It’s always exciting to find a new sewing tool. One of my recent discoveries is a new marking pen. When I’m sewing projects there are always things to mark. Sometimes it’s a cutting line. Sometimes it’s a place to join another piece of fabric. There are times that it’s necessary to mark the front or the back. There are various ways to mark any of these things. Sometimes it’s appropriate to make a notch in the fabric. There are times I’ve used tailor tacks. You can use marking chalk’s or marking pens. There are several different types of marking pens including water-soluble or air soluble. I’ve also used marking wheels and tracing paper. Another method of marking is actually stitching him a line without any thread. This can be handy as a guide to turn a hem. You can also use an iron to make a press mark or simply finger press a fold.
The current new sewing tool that I’m using for marking are pens made by Pilot. These Frixion Gel Pens are like magic. You can mark with them on fabric and then simply press with a hot iron and the marks go away. They are so fast and easy to use and the different colors make them easy to use on fabric. It’s too bad my children are all grown up. I’m sure they would’ve loved to use these pens to write secret messages. I can imagine all the fun, they would’ve had when playing with their friends. Hmm… maybe this should be a little something extra they get for a birthday or Christmas
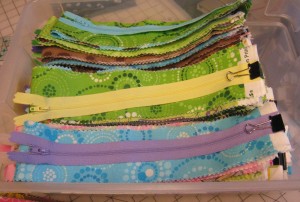
The next project will be a WIP for several months. Can’t say too much about it yet but here are the beginnings. All the roll up strips are matched with the zippers and another set or strips sorted for their project. None of it will be hard to do but the volume may be a challenge. Good think I have a few months!
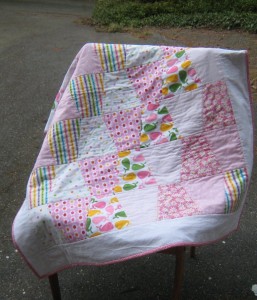
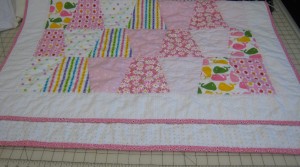
I did it. The pink baby quilt is finished. Like so many other projects when I got to the end I had trouble deciding on the binding. I finally picked a dark pink with little black and white flowers and I’m pleased with my choice. The darker pink frames the quilt nicely. I used a pink and green polka dot flannel on the back so it’s really cozy. I’ve washed it so it’s nice and soft and ready to gift or sell. Now on to the next project.
I love it when the mailman brings something other than bills. Today there were some things that I’ve ordered for upcoming projects. I will not be talking about them for a while because it’s a secret and will not be revealed until July or August! I hope I’ll be able to get them all done in time.
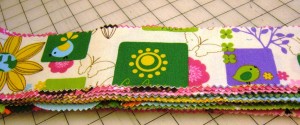
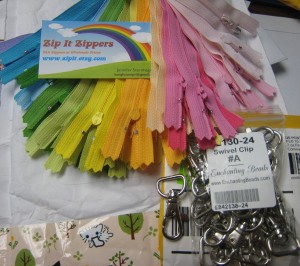
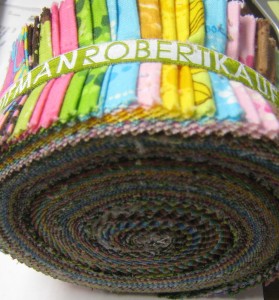
What was in the mail? Sixty 10″ zippers and 24 swivel clips. Oh, I’m anxious to get started! It will take a while but it will be fun. I’ve also purchased 3 yards of interfacing and 3 yards of warm and natural batting. Of course there are some assorted accessories as well like thread. Oh and fabric? Well yes there is fabric as well. I have many jelly rolls of fabric for this project. For those of you that don’t know about jelly rolls, we are talking about a roll of fabric strips that are 2.5 inches wide and include 42 strips of fabric. This provides lots of variety. Fun, fun, fun!
When my kids were little I did love to have a bib handy. When they were little it was drool, when they were bigger it was food and good messes.
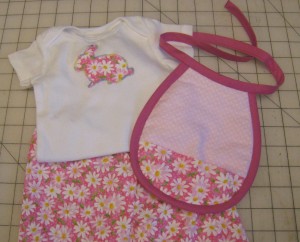
I found a pattern for a little bib that looks like it’s comparable size the new onsie and pants that I just finished. I used a small piece of flannel and a small piece of terry cloth. My original thought was to use an applique on the bib to coordinate with the onsie but I cut the applique too big and it didn’t look right. In the end I just added a little pocket at the bottom, used a package of bias tape that I had and was able to add this cute little bib to the stack. I’m pleased with the result and can see doing this again.
I just received a new die for my Slice Fabrique. After many trials I got this farm set from my daughter. She has been trying to get it for me for about 6 months and it keeps getting lost in transit. Last week I finally got the replacement that had been sent. She actually called tonight and said after 2.5 months the first one she ordered also arrived.
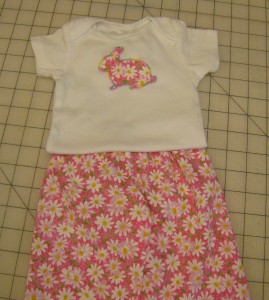
I’ve been waiting to try this out and knew that it was going to be a baby item. I’m trying to build up some stock to open and Etsy shop and I think this will be one of the items in my shop. It was lots of fun to applique the rabbit on the onsie and make up these little pants to go along with it. A perfect spring or summer outfit for a little girl.
I have a die that will cut hearts. Valentines day is coming and I love red. Seems to me this is a perfect combination to try something new.
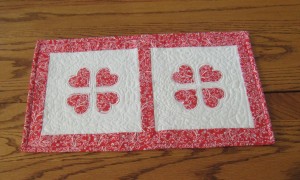
I have thought about this project for several weeks but had not made a decision about the direction. I finally decided I just needed to cut some hearts and then go ahead. I didn’t have any more product to make iron on appliques so the first step was make a trip to Joann’s. Now if you shop regularly at Joann’s you should never have to pay full price which is fine with me. That leaves more money to spend somewhere else. When I came home I had two different kinds of iron on applique product. I did some from both the Wonder Under and Heat and Bond Lite and have definitely decided I like the Heat and Bond better. Its easier to use and peels off the back more easily and cleanly. This however was an indication of how the entire project was going to go.
There were continuous challenges with this project. First not all the hearts peeled well. I decided I was just going to applique them onto a white square and satin stitch them. Sort of a make it up as you go kind of project. It’s been a long time since I have done much satin stitch applique so the hearts are not very consistent. After the third one I had already decided this was a project that was likely to end up in the trash. I did continue however because I decided it was already cut and it was good practice. After two squares of applique, several borders and a quilt sandwich I decided that it still didn’t look very good so I might as well practice some quilting. I started and it was really ugly! At this point I was about ready to put it in the trash. I ended up doing all sorts of free motion quilting patterns on the entire piece. There are many inconsistencies in the stitch length and smoothness but by the end it actually improved the looks of the entire piece. I think that the red fabric is so busy that by quilting the white it helped tie it all together. An instance of more really was better.
I put a binding on and it is on my dining room table. It I just go by and glance it actually looks ok. I sure wouldn’t want anyone to look closely at it and I certainly wouldn’t gift it to anyone but for a home product that I thought I was going to trash, it turned out very valentinish.
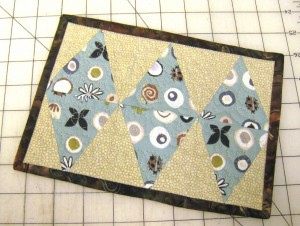
One of my goals this year is learning a new skill. I would like to be able to do a good job at free motion quilting. If you don’t know about free motion quilting it is sewing quilting lines with the feed dog dropped on the sewing machine and the sewer is responsible for guiding the quilt through the machine. The process sort of ends up like the kids game where you try to rub your stomach and pat your head at the same time. With free motion quilting however you have to control the speed of the needle with your foot and the direction and movement of the quilt with your hands. You need to coordinate the feet and the hands to get a smooth even stitch. This of course is much easier to talk about than actually doing. The needle has to be going faster than you think it should and your hands have to be moving more slowly and smoothly than you think they should. One way I have decided to practice this skill is practice every time I make something I’ve cut extra squares and strips. I’ve also made some practice squares to make sure the seams are correct when I’ve started a new project. Even though these squares have not all been accurate I decided instead of setting them aside or putting them in a pile or throwing them away, I can join them together. I can use a piece of leftover batting and some backing from “what was I thinking when I bought this” fabric and I have a piece to practice on. The results can be used for coasters, mug rugs, pot holders or ? It gives me practice and for pot holders etc, the function is more important the looks so it’s a win-win on all accounts.
